
Our popular Rustic Star makes a great canvas for a photo collage. No need to do any preparation to the star. Just glue your paper and photos directly to the metal.

Supplies:
• Rustic Metal Star
• 10 Photographs 4" X 6"
• 5 -12" x 12" Patterned Paper
• Tim Holtz Distress Ink
• Mod Podge
• Optional: Additional embellishments such as gems, ribbon, buttons, flowers, etc.
Tools:
• Paper Trimmer
• Ruler
• Pencil
• Scissors

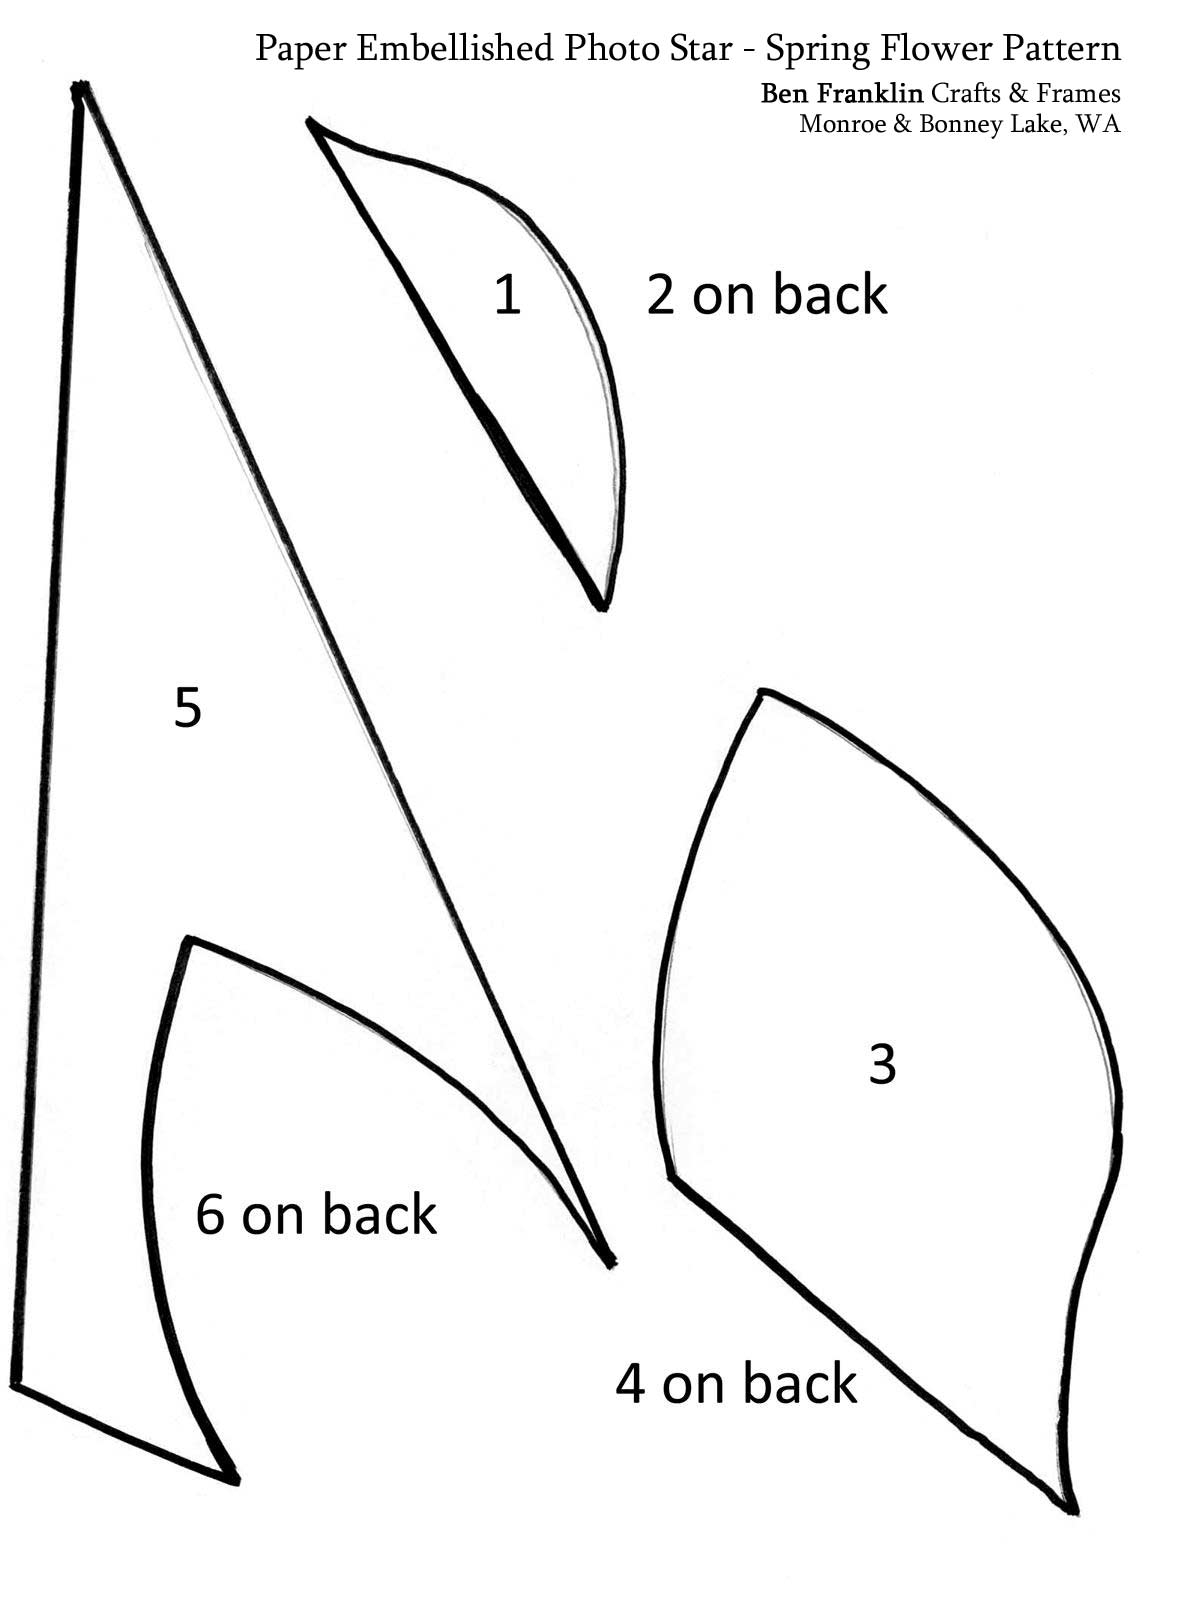
Template is available here. Right click on the image to save it on your computer.
1. Start by making a sturdy set of templates. (We recommend chipboard or a heavy cardstock). Cut out the shapes and trace them onto your heavy cardstock and carefully cut your traced shapes out. Label each side of the templates with its corresponding number (see picture of star).
2. Using your templates, trace onto the front side of your patterned paper and photos. Carefully cut out your shapes and arrange onto the star making sure that your photos will face the right direction.
3. When you are satisfied with your layout you can start to “distress” the edges of your scrapbook paper pieces. Apply the Distress Ink along the edges of each shape, this will remove the bright on the edges and blend it with the color of the star.
4. Then apply Mod Podge to the star where you’ll place your paper & pictures (do one piece at a time). Place your paper/pictures directly on the wet Mod Podge. Repeat this process for all your paper pieces and pictures. Let dry completely. Add a top coat of Mod Podge to seal completely. Note: The Mod Podge does dry clear and the finish will depend on whether you choose matte or glossy Mod Podge.
Design Idea: when dry, add additional embellishments such as gems, ribbon, buttons, flowers or vinyl lettering.

For more crafting tutorials, visit our Project Gallery HERE.
No comments:
Post a Comment